This article will show you how to easily add a watermark to any image using Paint.NET 4.0.3 – a recommended free graphical editing tool.
Well, basically you can use any of your favorite tool that supports layers.
We are going from this:

to this:

or this:

Step 1
Make sure that you have all needed windows in paint.net opened:
– Tools (toggle using F5 key)
– Layers (toggle using F7 key)
– Colors (toggle using F8 key)
Also you can enable them by UI in right upper corner of paint.net window

Step 2
On Layers window click “Add new layer”.
This layer will have the watermark text. It will be separated from the main image. This will allow you later to move or resize watermark and select way to blend it with picture.

Step 3
On Colors window select white color

Step 4
Select Text tool (you can press T)

Step 5
Type in text you want. Usually best is to type in url of your web page.
Tip: To type a © symbol on Windows press Ctrl+Alt+C. If that doesn’t work, you can hold the Alt key and type 0169 on number pad on your keyboard. On OS X on a Mac, type Option+C – the Option key is generally marked Alt.

Step 6
On Layers window click Properties

Step 7
Set Mode Normal and Opacity to 95 but feel free to test any configuration.
In Layers Properties window you specify how the watermark should blend with the main image.

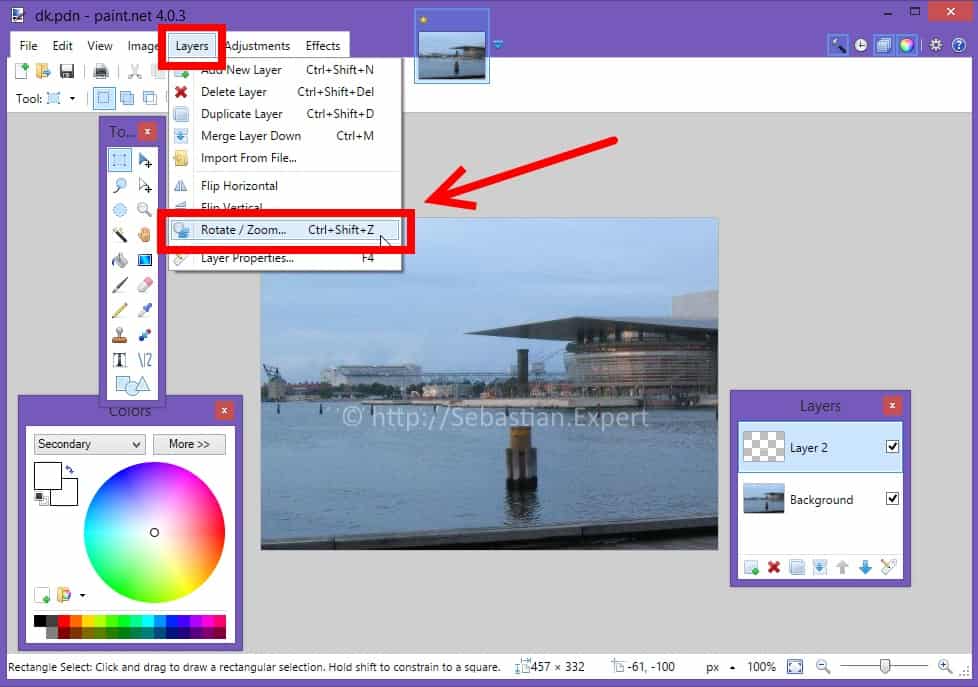
Step 8
Now decide where to place and how to transform the text.
Remember to place it where there are a lot of details on the picture so it will be hard to remove. Do not place it behind solid colors ex. sky etc.
You have two options:
- Move
You can move it by selecting Move Selected Pixels (shortcut key: M) and then moving the layer with text around.

- Rotate
You can roll/rotate it. In the example I set the first parameter to 25,29